Exploring Different OS Installations and Usage Guides on RG35XX Plus Open Source Handheld
Currently, I find muOS more suitable for me (click to jump directly to the muOS section). It boots quickly, has a simple yet comprehensive OS, and offers a community. I expect to use this OS more in the future, and I will continue to share my experiences as I go.
Installing Official Stock OS
Installation Steps
- Download the OS from: https://win.anbernic.com/download/, on the page, find the corresponding machine and download the file. For example, I downloaded “cxm_rg35xx-p-en16gb-240409_2024-04-16_1111.zip”. After extracting it twice, you get “RG35XX+-P-EN16GB-OS240409.IMG” (about 16GB), which is the OS image we need
- Write the OS image to a TF card using tools like Etcher or Rufus
- Insert the TF card into the TF1 slot of the handheld and power it on
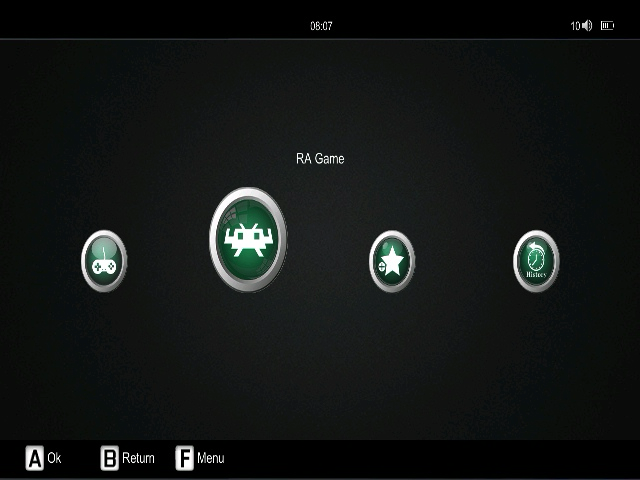
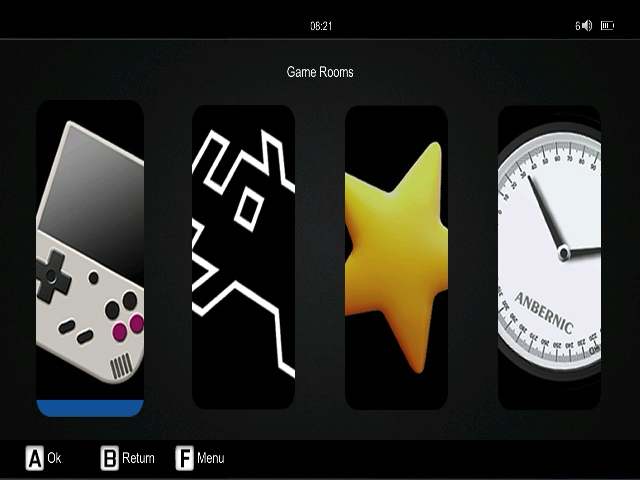
- Enter the OS, where the left side shows the new icon style, and the right side shows the old icon style. You can change the style in the settings

The official 16GB OS cannot be expanded. Even if you use a 64GB TF card, you can only use 16GB, and the space for storing ROMs is only 4.5GB, as shown below:
/dev/disk6 (internal, physical):
   #:                       TYPE NAME                    SIZE       IDENTIFIER
   0:      GUID_partition_scheme                        *63.9 GB    disk6
   1:       Microsoft Basic Data NO NAME                 4.5 GB     disk6s1
   2:       Microsoft Basic Data Volumn                  33.6 MB    disk6s2
   3:       Microsoft Basic Data                         16.8 MB    disk6s3
   4:       Microsoft Basic Data                         67.1 MB    disk6s4
   5:       Microsoft Basic Data                         8.6 GB     disk6s5
   6:       Microsoft Basic Data                         2.3 GB     disk6s6
                    (free space)                         48.3 GB    -
The official source also provides a 64GB OS image “RG35XX+-P-EN64GB-240409” includes many ROMs. Using this image can make full use of a 64GB TF card, and you can replace the ROMs with the ones you need. Alternatively, you can install unofficial OSes, at least the ones I installed support automatic space expansion, making full use of the TF card’s capacity.
Usage Records and Guides
It takes 17 seconds from completely powering off the handheld to fully starting up and being operational.
The handheld can insert two TF cards, we can also put game ROMs on the second card by:
- Shutting down the handheld
- Formatting the second TF card to FAT32 or exFAT
- Inserting it into the TF2 slot
- Powering on the handheld, it will generate some directories in the second card, such as the “Roms” directory. Under this directory, a bunch of different platform directories will be created for easy categorization. Of course, we can also organize them in our own way, just manually select the path when using the emulator
Installing Stock MOD4 OS
Installation Steps
- Download the OS from: https://www.reddit.com/r/RG35XX_Plus/comments/1cdixev/modified_stock_firmware_mod4/, click “» Download Here «” at the end of the post to access the download page. For example, I downloaded “RG35XXP-EN240409-MOD4-fixed.7z” and extracted it to get the OS image “RG35XXP-EN240409-MOD4.IMG”
- Write the OS image to a TF card using tools like Etcher or Rufus
- Insert the TF card into the TF1 slot of the handheld and power it on
- Enter the OS, which looks the same as the official Stock OS because only functional improvements were made
Usage Records and Guides
It takes 17 seconds from completely powering off the handheld to fully starting up and being operational.
This OS, created by TomDuhamel, is based on the official Stock OS with several improvements:
- Added FTP server:
-
Enable Wi-Fi in the system settings, connect, and note the assigned IP. Use an FTP tool to connect to
ftp://<Your IP>, with both username and password asgame. Alternatively, use the command line:> ftp <Your IP> Connected to <Your IP>. 220 (vsFTPd 3.0.3) Name (<Your IP>:<Your Name>): game 331 Please specify the password. Password: 230 Login successful. Remote system type is UNIX. Using binary mode to transfer files. ftp> cd mmc/Roms/FC 250 Directory successfully changed. ftp> put tstd2.nes local: tstd2.nes remote: tstd2.nes 229 Entering Extended Passive Mode (|||13755|) 150 Ok to send data. 100% |*******************************| 640 KiB 4.03 MiB/s 00:00 ETA 226 Transfer complete. 655376 bytes sent in 00:00 (3.44 MiB/s) ftp> bye 221 Goodbye.
-
- Added network time update function:
- Naturally, you need to enable Wi-Fi to use it
- Supports automatic partition expansion:
-
On the first boot, a new “Games” partition is created at the end of the card and expanded to use all available TF card space
/dev/disk6 (internal, physical):
#:                       TYPE NAME                    SIZE       IDENTIFIER
0:      GUID_partition_scheme                        *63.9 GB    disk6
1:           Linux Filesystem                         33.6 MB    disk6s1
2:       Microsoft Basic Data Volumn                  33.6 MB    disk6s2
3:       Microsoft Basic Data                         16.8 MB    disk6s3
4:       Microsoft Basic Data                         67.1 MB    disk6s4
5:       Microsoft Basic Data                         8.6 GB     disk6s5
6:       Microsoft Basic Data                         524.3 MB   disk6s6
7:       Microsoft Basic Data Games                   54.6 GB    disk6s7
-
Installing Batocera v40 Beta OS
Installation Steps
- Download the OS from: https://github.com/rg35xx-cfw/rg35xx-cfw.github.io/releases/tag/rg35xx_plus_h_batocera_20240306, download “batocera-h5-rg35xx-plus-40-20240306.img.gz” and extract it to get the OS image “batocera-h5-rg35xx-plus-40-20240306.img”
- Write the OS image to a TF card using tools like Etcher or Rufus
- Insert the TF card into the TF1 slot of the handheld and power it on
- Enter the OS, which gives a great first impression with its beautiful interface

There is a lot of available space, a 64GB card still has 59.5GB of free space:
/dev/disk6 (internal, physical):
   #:                       TYPE NAME                    SIZE       IDENTIFIER
   0:      GUID_partition_scheme                        *63.9 GB    disk6
   1:           Linux Filesystem                         21.0 MB    disk6s1
   2:           Linux Filesystem                         16.8 MB    disk6s2
   3:       Microsoft Basic Data BATOCERA                4.3 GB     disk6s3
   4:       Microsoft Basic Data SHARE                   59.5 GB    disk6s4
Usage Records and Guides
-
It takes 26 seconds from completely powering off the handheld to fully starting up and being operational
-
The OS has SMB sharing enabled by default, which can be used to upload ROMs, back up saves, etc. The username and password are
root/linux -
We can also enable Syncthing for real-time synchronization of ROMs and saves. To enable it, press the START button to enter MAIN MENU → select SYSTEM SETTINGS → scroll down to SERVICES → enable SYNCTHING
Installing muOS 2405 BEANS OS
Installation Steps
- Download the OS from: https://muos.dev/release/plush/2405, download “muOS-RG35XX-2405-BEANS.zip” and extract it to get the image “muOS-RG35XX-2405-BEANS.img”
- Write the OS image to a TF card using tools like Etcher or Rufus
- Insert the TF card into the TF1 slot of the handheld and power it on
- After a while, you will enter the “DEVICE TYPE” page, select “RG35XX - PLUS” → go to the “TIMEZONE” page and choose a corresponding timezone → go to the “DATE AND TIME” page and set the correct time → press “B” to save → enter the long OS installation process → after installation, the OS will automatically boot
- Enter the OS, where the left side shows the new Beans theme and the right side shows the Classic theme. More themes are available in the settings
There is also a lot of available space, a 64GB card still has 59.6GB of free space:
/dev/disk6 (internal, physical):
   #:                       TYPE NAME                    SIZE       IDENTIFIER
   0:      GUID_partition_scheme                        *63.9 GB    disk6
   1:                        EFI                         2.1 MB     disk6s1
   2:                        EFI BOOT                    33.6 MB    disk6s2
   3:                        EFI                         16.8 MB    disk6s3
   4:                        EFI                         67.1 MB    disk6s4
   5:                        EFI                         4.0 GB     disk6s5
   6:                        EFI                         134.2 MB   disk6s6
   7:       Microsoft Basic Data ROMS                    59.6 GB    disk6s7
Usage Records and Guides
-
It takes 9 seconds from completely powering off the handheld to fully starting up and being operational. The boot speed is impressively fast
-
To enable “Wi-Fi”: Configuration → Wi-Fi Network → click “Enabled” → move to “Identifier” and press “X” to enter the search page → select a Wi-Fi network → move to “Password” and enter the password → move to “Connect” and click → after a successful connection, the “Status” at the bottom will show: Connected - <Your IP>, remember your IP
-
To enable “SFTP + Filebrowser”: Configuration → Web Services → SFTP + Filebrowser → click “Enabled”,
the SFTP port is 2022, you can connect using an SFTP client with both username and password asmuos,
the WebUI port is 9090, you can enter<Your IP>:9090in your computer’s browser to access the file management page, with both username and password asmuos -
To enable “Syncthing”: Configuration → Web Services → Syncthing → click “Enabled”,
after enabling, enter<Your IP>:7070in your computer’s browser to access the muOS Syncthing management page -
How to manage game ROMs: According to the official website, the only firm rule is that they must be located in sub-folders under the ROMS folder, here is an example from the official website:
. └─ ROMS ├── SEGA │ ├── Master System │ │ └── <game files here> │ └── Mega Drive │ └── <game files here> ├── Nintendo Entertainment Sytem │ └── <game files here> └── SNES └── <game files here> -
Hotkeys:
Type Hotkey Brightness MENU + Volume Screenshot L2 + R2 (press simultaneously) Sleep Suspend Hold POWER for 1 seconds Power on Hold POWER for 5 seconds Power off Hold POWER for 5 seconds Return to content root directory START (in content directory) Re-select RetroArch core SELECT (with a specific game selected) Open RetroArch menu MENU + X (in RetroArch) Close RetroArch SELECT + START (in RetroArch) Fast forward MENU + R1 (in RetroArch) Slow motion MENU + L1 (in RetroArch) Load state MENU + R2 (in RetroArch) Save state MENU + L2 (in RetroArch)